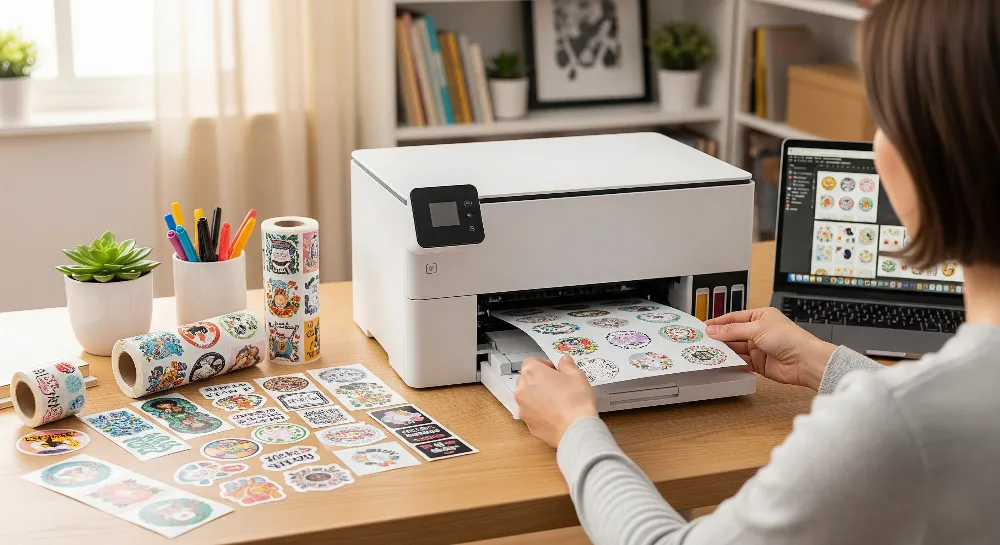
Want to make your own stickers at home but feel unsure? To print stickers on sticker paper, you need a printer, sticker paper, and your sticker design. Here’s what you need:
Printer (inkjet or laser, based on sticker paper)
Sticker paper (pick the right type for your printer)
Sticker design (made with easy design tools)
Picking the right sticker paper is important. Paper stickers are the most popular for home printing. They are simple to change and do not cost much. Look at the most common types below:
Sticker Material Type | Market Share (2024) | Notes |
|---|---|---|
Paper Stickers | Easy to use and cheap | |
Vinyl Stickers | Growing fast | Strong and easy to change |
Foil Stickers | Mentioned | Shiny look |
Eco-friendly Stickers | Fastest growing | Breaks down naturally |
People think printing stickers at home is easy and fun. You get to control your sticker design and can try printing right away. Making stickers at home is best for small amounts and personal use. Use the right materials and anyone can make stickers that look nice.
Key Takeaways
Pick a good printer and sticker paper for bright stickers. This helps your stickers look clear and last longer. – Use design tools like Canva or Adobe Illustrator to make sharp images. Set your images to 300 DPI for the best prints. – Change your printer settings with care. Pick the right paper type and best quality. This stops smudges and fading. – Let your stickers dry all the way before you touch them. You can laminate vinyl stickers to keep them safe from water and scratches. – Cut your stickers neatly with scissors or a cutting machine. Do a test print first so you can find mistakes early.
Materials for Stickers
Printer Types
Picking the right printer is important for stickers. Inkjet printers use liquid ink. They make stickers with bright colors and sharp details. These printers work well for vinyl sticker paper. Inkjet printers are good for homemade stickers that need clear pictures. But inkjet printers print slower. They also need more ink refills. Laser printers use toner powder and heat. They print stickers fast. Laser printers are better for making lots of simple stickers. The colors from laser printers are not as bright or sharp. Laser printers work faster than inkjet printers. The heat from laser printers can hurt some sticker papers. Vinyl sticker paper may bend or lose stickiness from heat. It is important to match your printer to the sticker paper. This helps stop smudging, fading, or peeling.
Criteria | Inkjet Printer Characteristics | Laser Printer Characteristics |
|---|---|---|
Color Accuracy | Vivid, accurate colors | Less vibrant, lower accuracy |
Print Resolution | 600-1200 dpi | |
Print Speed | Slower | Faster |
Suitability | Best for custom, detailed stickers | Best for simple, bulk stickers |
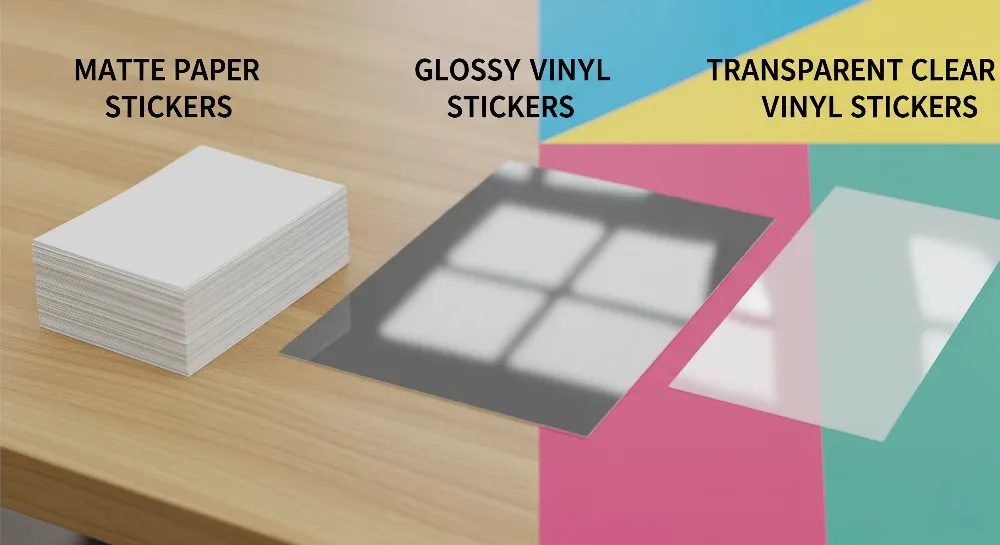
Sticker Paper Options
Sticker paper comes in many types. Each type works best for certain uses. Glossy sticker paper makes stickers shiny. It is good for colorful sticker designs. Matte sticker paper has a smooth finish. It does not shine. Matte paper is great for writing or drawing on stickers. Clear vinyl sticker paper is popular for custom stickers. It blends into surfaces and lasts outside. Vinyl sticker paper is waterproof and strong. It does not smear, tear, or peel easily. Vinyl sticker paper is good for homemade stickers that need to last. Brands like Royal Elements and Cricut sell vinyl sticker paper. Their sticker paper sticks well and is easy to cut. Always match sticker paper to your printer. Use inkjet printers for most vinyl sticker paper. Use laser printers for paper stickers. This gives you the best results.
Tip: Use vinyl sticker paper for outdoor or water-resistant stickers. Let your prints dry before using them.
Design Tools
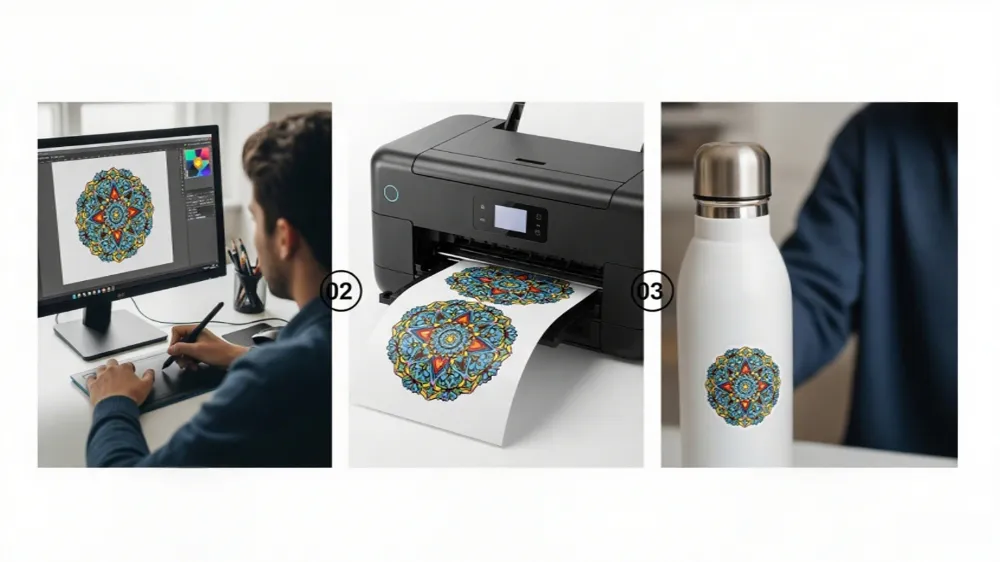
Making custom stickers starts with good design tools. Adobe Illustrator is great for high quality sticker designs. Free tools work well too. Canva has easy templates and quick editing. Beginners like Canva for simple sticker designs. GIMP has advanced features for detailed sticker art. Avery Design & Print Online helps with layouts and printing guides. These tools let you export high quality images. They help you make custom cut paths and control colors. Look for vector graphics, layers, and CMYK color mode. These features help make stickers ready to print. Test your designs with sample prints first. This helps you find mistakes before printing many stickers.
Note: Export sticker designs at 300 DPI or higher. This makes your stickers look sharp and professional.
How to Print Stickers
Prepare Your Design
Sticker making starts with a good design. They use design software like Microsoft Word for simple shapes or Adobe Creative Suite for advanced graphics. Canva and GIMP work well for beginners and experts. The designer saves the file in a format the printer can read, such as PDF, JPG, or PNG. For best results, they set the resolution to 300 DPI. This makes stickers look sharp and clear. They check the color mode—RGB for inkjet printers and CMYK for professional printing. Before printing, they add a bleed area around the edges. This extra space helps avoid white borders after cutting. They leave enough room between each sticker on the sheet. This makes cutting easier and prevents tearing.
Tip: Always test your sticker design with a sample print. This helps spot mistakes and lets you see how the sticker will look on real paper.
Load Sticker Paper
Loading sticker paper the right way helps prevent jams and misprints. They check the printer’s manual to see if the paper goes face up or face down. For laser printers, they use the drawer tray and select the “Glossy Paper” setting for multiple sheets. If the sticker paper is thick, they feed one sheet at a time using the manual tray. They flatten any curled sheets before loading. Only a few sheets go in the tray at once. This stops feeding problems. They clean the printer rollers often to remove dust and sticky residue.
Steps to load sticker paper:
Place sticker paper in the tray as the printer manual shows.
Use the manual feed tray for thick or vinyl sticker paper.
Feed one sheet at a time for best results.
Clean rollers to keep paper moving smoothly.
Adjust Printer Settings
Printer settings make a big difference in sticker quality. They select the right paper type—“Labels,” “Sticker Paper,” or “Photo Paper.” For glossy stickers, they choose the “Glossy Paper” setting. For matte stickers, they pick “Matte Photo Paper.” They set print quality to “Best” or “High.” Borderless printing helps designs reach the edge of the sticker. They set page scaling to 100% or “Actual Size.” Pigment-based inks work best for stickers that need to last. Increasing ink density gives bolder colors. For clear stickers, they use white ink to make designs stand out.
Note: Always check ink levels before printing stickers. Low ink can cause faded colors and streaks.
Common sticker paper printer settings:
Printer Type | Paper Setting | Quality Setting | Special Tips |
|---|---|---|---|
Inkjet | Photo/Sticker | Best/High | Use pigment ink for durability |
Laser | Labels/Glossy | Best/High | Feed one sheet at a time |
Print Stickers
They print stickers after setting up the design and printer. First, they run a test print on regular paper. This checks alignment, color, and sharpness. If the test looks good, they print stickers on sticker paper. They let the stickers dry for 15-20 minutes before touching them. Dye-based inks dry fast but can smudge if handled too soon. Pigment-based inks dry quickly, but waiting a minute helps. For high-quality prints or specialty papers, they leave stickers untouched for several hours. Humidity and temperature can change drying times.
Tip: For homemade vs professional stickers, drying time matters. Professional stickers may use special inks that dry faster.
Cut and Finish
Cutting stickers neatly gives them a professional look. They choose the right cutting method. Die-cut works for custom shapes. Kiss-cut is best for sticker sheets with many designs. Perforated cuts help with bulk stickers. They use vector files for clean lines. Adding bleed prevents white edges. They leave space between stickers to avoid tearing. Peel tabs make stickers easy to remove. Rounded corners help stickers last longer and look smooth. They avoid placing important design parts near the edge.
Sticker cutting tips:
Use sharp scissors or a craft knife for straight edges.
Try a cutting machine for complex shapes.
Add contour cut lines with rounded corners.
Keep cutting tools clean for best results.
Callout: Sticker making tutorial videos can show how to cut and finish stickers for a polished look.
Printing stickers at home is easy when you follow these steps. Anyone can print stickers that look great and last. With the right sticker paper, printer settings, and cutting methods, homemade stickers can rival professional ones.
Print on Vinyl Sticker Paper
Printer Settings for Vinyl
Printing on vinyl sticker paper gives stickers a professional look and feel. To get the best results, users should adjust their printer settings before starting. They select the correct paper type, such as “Photo Paper,” “Glossy,” or “Sticker Paper,” on their inkjet printer. This setting helps the ink stick to the vinyl sticker paper and makes colors pop. Users always choose the highest print quality mode, like “Best” or “High.” This setting uses more ink but creates sharp, vibrant stickers.
They feed vinyl sticker paper one sheet at a time to avoid jams. Inkjet printers work best for this job because they handle vinyl sticker paper smoothly. Before printing a full batch, users run a test print on regular paper. This step checks color and alignment. After printing, they let the stickers dry for at least 15–20 minutes. This drying time keeps the ink from smudging on the vinyl sticker paper. Users store extra vinyl sticker paper in a cool, dry place to keep it flat and sticky.
Tip: Always check ink levels before printing. Low ink can cause faded stickers and streaks.
Steps to print on vinyl sticker paper:
Select “Photo Paper” or “Sticker Paper” in printer settings.
Choose “Best” or “High” print quality.
Run a test print first.
Let stickers dry for 15–20 minutes before touching or cutting.
Lamination Tips
Laminating stickers made with vinyl sticker paper protects them from water, scratches, and sunlight. Users can pick between glossy or matte laminating sheets. Glossy laminates make stickers look shiny and bright. Matte laminates reduce glare and give a smooth finish. Some people use spray sealants, like clear acrylic sprays, for a quick protective layer. These sprays help stickers last longer, especially on water bottles or outdoor gear.
Laminating sheets stick right over the printed stickers. Users smooth out bubbles with a ruler or a soft cloth. For extra protection, they can use UV coatings to stop fading from sunlight. Waterproof coatings keep stickers safe from rain and splashes. After laminating, users cut out the stickers. Laminated vinyl sticker paper feels thicker and lasts longer.
Note: Always test a small sticker before laminating a whole batch. This step helps avoid bubbles or peeling.
Laminating makes stickers printed on vinyl sticker paper strong and ready for any use, indoors or outdoors.
Troubleshooting Stickers
Printer Issues
Sometimes, printing stickers does not go as planned. You might see streaks or faded colors on your stickers. Prints can also look uneven. Laser printers jam if the sticker paper is too thick or curled. Inkjet printers clog if you do not use them for a long time. Clean the print heads often and check for dust inside. Humid air makes stickers dry slower and can cause smudges. Many people forget to use the right sticker paper for their printer. Laser printers need paper that can handle heat. Inkjet printers work best with vinyl or glossy sticker paper.
Common Issue | Explanation |
|---|---|
Ink smears if it is not dry before you use the adhesive or move the sticker. | |
Excessive Ink Usage | Using too much ink makes the colors bleed and edges look blurry. |
Incorrect Heat Press Settings | Wrong heat or pressure makes stickers not stick well. |
Humidity and Environmental Factors | Humid air slows drying and can cause smudges. |
Tip: Keep sticker sheets flat and store them in a dry place. This helps stop jams and keeps stickers looking good.
Ink and Smudging
Ink bleeding and smudging are common problems for sticker makers. This happens when you use the wrong paper or printer settings. Inkjet printers need sticker paper that soaks up ink well. Laser printers need sticker sheets that can handle heat. Too much ink can make the paper too wet and colors run. Lower the print quality or try another sticker paper if you see smudges. Let stickers dry all the way before you touch or stack them. Use clean, dry hands or gloves to keep oil off the prints.
Common Issue | Explanation |
|---|---|
Too much ink fills the paper and makes it bleed. | |
Using Wrong Paper | If the paper does not soak up ink, it will bleed and smudge. |
Printer Settings Mismatch | Wrong settings make bleeding more likely. |
Paper Finish and Coating | The wrong finish can make ink dry badly. |
Note: Watch the humidity in your room. Keep it between 40% and 45%. This helps stickers dry faster and stops smudging.
Paper Jams
Paper jams can ruin your sticker project. Laser printers jam more with thick or curled sticker paper. Inkjet printers have trouble with sticker sheets that are not the normal size. Feed one sheet at a time and use the bypass tray for a straight path. Do not put too many sheets in the tray. Make sure the paper guides are lined up. Good sticker paper helps stop wrinkles and jams. Clean your printer and remove dust to help prevent jams.
Pick a thicker media type, like labels or card stock, in the printer settings.
Use a custom paper size for sticker sheets that are not standard.
Store sticker paper flat and do not use bent or damaged sheets.
Clean the printer rollers and do not overload the trays.
Keep the air dry to stop the paper from curling or shrinking.
Ink tank printers are a smart choice if you print stickers a lot. They have big tanks you can refill and print thousands of stickers before running out. Cartridge printers cost less at first but need new cartridges often. Ink tank printers save money over time and make less plastic trash. If you print stickers often, ink tank printers are the best option.
Make Stickers at Home
Tips for Best Results
Anyone can make stickers that look nice and last longer. They should use pictures with high resolution. Blurry or pixelated images make stickers look bad. Bright colors help designs stand out. Light colors may look faded after printing. Pick the highest print quality on the printer. Match sticker paper to the printer type. This stops smudging and keeps colors bright.
To make stickers that last, use vinyl sticker paper and pigment-based inks. These materials resist water and fading. Laminate stickers with clear sheets or use spray sealant for extra protection. This keeps stickers safe from sunlight and scratches. Keep ink cartridges full and clean. This helps avoid color problems. Die cutting makes cool shapes and gives a professional look. Break up big solid color areas in your design. This helps stop uneven printing.
Tip: Print a sample sticker first. This helps you find mistakes before printing a lot.
Customization Ideas
People like making custom stickers to show their style. Try different sticker materials like glossy, matte, or clear paper. Each type looks and feels different. Use finishes like holographic or reflective sheets for fun effects. Cutting machines like Cricut or Silhouette help make special shapes and sizes.
Popular sticker themes are animals, food, flowers, and cartoons. Many people make holiday designs or add motivational quotes. Kawaii-style stickers use pastel colors and cute faces. These are great for planners and notebooks. Kids use dot stickers for art, mandalas, or alphabet games. Add glitter, bold fonts, or cool icons to make stickers unique.
Note: Try new designs and materials. This helps you find what works best for homemade stickers.
Making stickers at home is easy if you follow each step. First, choose a good printer. Next, make your design carefully. Match the sticker paper and ink to your printer. Change the printer settings for the best print. Add lamination to help stickers last longer. Try using vinyl sticker paper or put on a protective layer. This makes your stickers look better and last more.
Material | Benefit |
|---|---|
Waterproof, strong, safe from sun | |
Lamination | Stops scratches and fading |
Homemade stickers let you be creative. Professional printers work fast and make perfect stickers. Want to save time and ink? Go to our website to see custom thermal labels. Find out how pro printing can give your business great stickers!
FAQ
How can someone stop stickers from smudging after printing?
Let stickers dry for at least 15 minutes before touching them. Use the correct sticker paper for the printer. Pigment-based inks help prevent smudging. Laminate stickers for extra protection.
What printer settings work best for vinyl sticker paper?
Set the printer to “Photo Paper” or “Best Quality” mode. Feed one sheet at a time. Always check the sticker paper printer settings in the print menu. This helps colors look bright and sharp.
Can people print stickers at home without a cutting machine?
Yes! Use scissors or a craft knife for simple shapes. For straight lines, a ruler helps. Cutting machines work faster, but anyone can make homemade stickers by hand.
What is the difference between homemade and professional stickers?
Homemade stickers use home printers and sticker paper. They work well for small batches and custom designs. Professional stickers use special printers and materials. These stickers last longer and look more polished.
Why do stickers sometimes peel off too soon?
Stickers peel off early if the surface is dirty or oily. Clean the area before sticking. Use high-quality sticker paper. Press down firmly to help the sticker stick better.