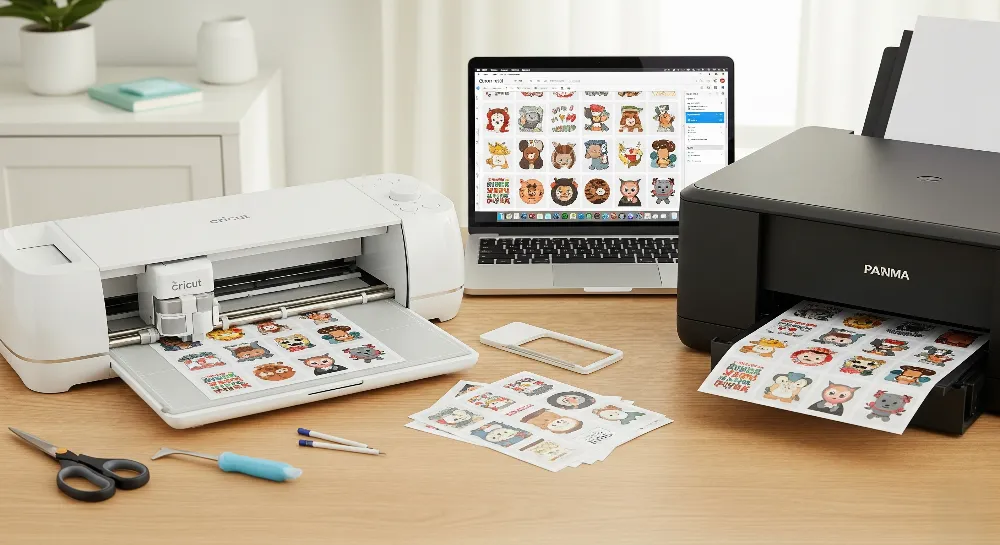
Printing sticker sheets with Cricut helps anyone make stickers at home. Many beginners ask about the best Cricut sticker paper settings. They also want to know the best printer for Cricut stickers. Some people have trouble with Cricut print then cut problems. Some wonder if homemade stickers or professional printing is better for business. He can use print and cut to make stickers for crafts, planners, or gifts. The process is fun and easy for all ages. People often ask about the right material settings. They also ask about calibration and how to load sticker sheets. The table below shows beginner questions:
Common Beginner Questions | Explanation |
|---|---|
Which material settings should I use for sticker sheets? | Cricut gives special material settings for printable sticker paper, vinyl, and clear sticker paper. These settings help get the best print then cut results. |
Why do I need to calibrate my machine for Print then Cut? | Calibration helps the machine cut along the printed image edges. There are step-by-step instructions for each device. |
He should try to print sticker sheets without being afraid of mistakes. Practice makes sticker results better each time.
Key Takeaways
Pick the correct Cricut machine, sticker paper, and printer settings. This helps you get good print and cut results.
Make sure to calibrate your Cricut machine and printer. This helps the cuts match the printed designs. It also helps you avoid common problems.
Use kiss-cut for easy peeling and sticker sheets. Use die-cut for neat single stickers. Pick the one that fits your project.
Always print with registration marks on matte paper. Put sticker sheets on a clean, sticky mat. Load them carefully.
Practice making stickers and use troubleshooting tips. This helps you fix alignment, print quality, and cutting problems. Your stickers will look professional.
Materials for Print Sticker Sheets
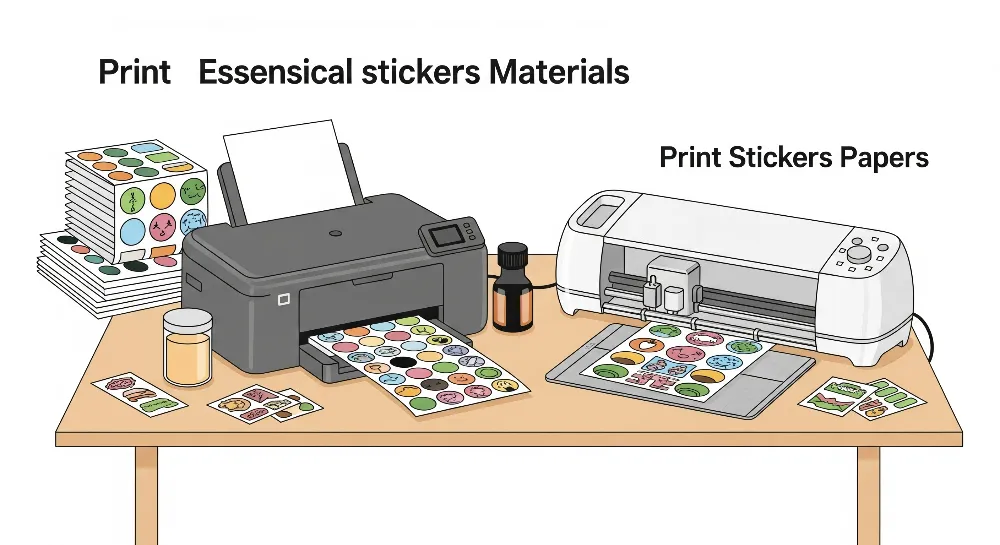
Cricut Machine & Accessories
You need the right Cricut machine and tools to make sticker sheets. Some popular machines are Cricut Explore Air 2, Cricut Explore 3, Cricut Joy, Cricut Joy Xtra, and Cricut Maker. Each Cricut machine has special features for making stickers. The Cricut Explore Air 2 is good for printing and cutting stickers. The Cricut Maker can cut more types of sticker paper and printable vinyl. Beginners should use a Light Grip Mat (blue) to hold the sticker paper softly. This mat makes it easy to peel off stickers after cutting. Keep your Cricut sticker supplies on a flat table. Calibration is needed for the Cricut Maker and Explore machines. It helps the machine cut stickers in the right place.
Cricut Model | Sticker Making Capability | Notable Features Relevant to Stickers |
|---|---|---|
Cricut Explore Air 2 | Commonly used for stickers | Used for printing and cutting sticker sheets |
Cricut Explore 3 | Compatible with sticker paper | Supports mats and Smart Materials |
Cricut Joy | Compatible with sticker paper | Compact, Bluetooth connectivity |
Cricut Joy Xtra | Compatible with sticker paper | Easy Printables™ sensor, full-color stickers |
Cricut Maker | Advanced cutting options | Cuts printable vinyl and sticker paper |
Printable Sticker Paper
Sticker paper is the main thing you need to make stickers with Cricut. Printable vinyl is also used for strong sticker sheets. Some good brands are Cricut Printable Sticker Paper, Cricut Printable Vinyl, Joyeza Vinyl Sticker Paper, Paper Plan Vinyl Sticker Paper, Online Sticker Paper, and Townstix Sticker Paper. These sticker papers cut well and stick to things easily. Most sticker paper is not waterproof, but it sticks well for homemade stickers. Printable vinyl lasts longer and does not scratch easily. Paper sticker paper is better for the environment and breaks down faster. Vinyl sticker sheets are best for outside but are not as eco-friendly. Picking the right Cricut sticker supplies helps you avoid problems with print then cut.
Tip: Use printable vinyl if you want stickers to last longer or stay safe in the rain.
Where to Buy the Best Paper
Many stores sell sticker paper and printable vinyl for Cricut. Some good brands are HP Printable Vinyl Sticker Paper, Avery Sticker Project Paper, OnlineLabels.com, Silhouette Printable White Sticker Paper, and Neato Full Sheet White Sticker Paper. These brands make sticker sheets that work well with Cricut settings. Buying from trusted brands helps you get better stickers at home.
Printer Setup
A good printer setup makes your stickers look bright and clear. The best printer for Cricut stickers is usually an inkjet printer. Cartridge-free printers save money and print lots of colorful stickers. Set your printer to ‘Best’ or ‘High-Quality’ mode for sharp pictures. Pick ‘Glossy Paper‘ or ‘High-Gloss Photo Paper’ settings for printable vinyl. Make sure the paper size matches your sticker paper, usually 8.5″ x 11″. Use manual feed for thick sticker sheets so they do not get stuck. Always print a test page to check if the colors and lines look right. Let the ink dry for 15-30 minutes before you cut the stickers. Calibrate your printer to get the best sticker sheet results.
Design and Make Stickers with Cricut
Cricut Design Space Setup
To make stickers, open Design Space first. Pick your Cricut machine in the software. This sets up the right settings. You can use images from the library. You can also upload your own designs. Before you start, you need to calibrate. Calibration helps the machine cut on the lines. Find calibration under Menu, then Settings, then Machines, then Machine Calibration. Print a calibration sheet and put it on the mat. The machine scans and cuts the sheet. If the cuts do not match, Design Space helps you fix it. This step stops cutting problems and saves sticker paper.
Upload or Create Designs
Design Space lets you upload many file types. You can use .jpg, .png, .svg, and .dxf files. Make your stickers in Canva or other programs. Save your files as PNG or JPG to upload easily. Canva helps you make cool shapes and clear backgrounds. This makes it easier for Cricut to cut around your design. After you upload, use tools to erase backgrounds or add borders. To make sticker sheets, pick your images and click the create sticker button. Choose kiss-cut or die-cut styles. Change the border thickness and color.
Tip: Use Canva or similar programs to control how your stickers look and what shape they are.
Arrange and Resize Stickers
Put and size your stickers on the Design Space canvas. Add a rectangle as a guide. Make it 6.75 by 9.25 inches. Stickers must fit inside this space. Drag the corners to make stickers bigger or smaller. Copy stickers to fill empty spots. Delete the guide rectangle when done. Select all stickers and use the Flatten tool. This makes one printable layer. It helps Cricut cut the stickers right. You can use the Offset tool to add borders. Use the Attach tool to keep stickers together. These steps help you make stickers that look good and avoid problems with homemade stickers.
Print and Cut Stickers
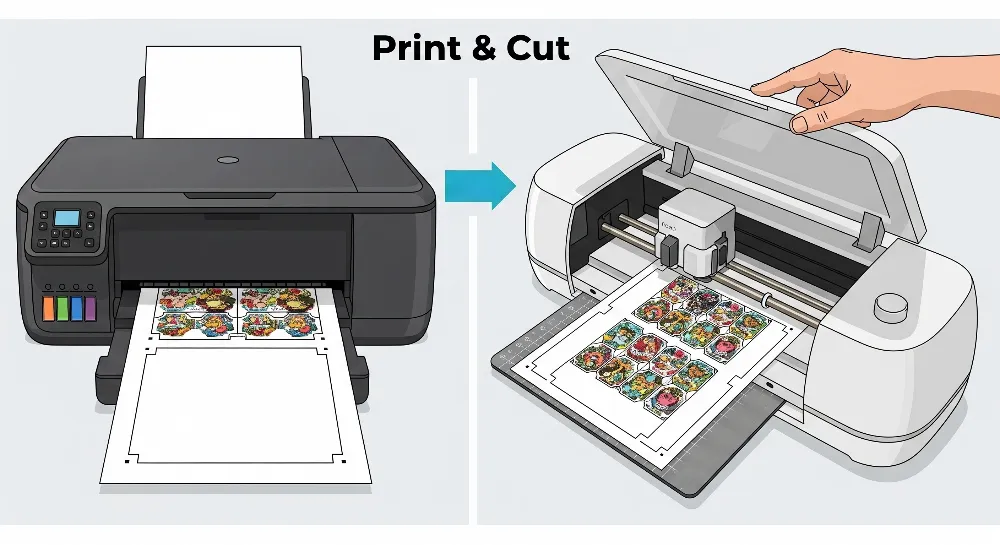
Print the Sticker Sheet
Printing stickers starts with the print-then-cut tool in Cricut Design Space. This tool prints sticker sheets with special registration marks. The marks help the Cricut machine cut the stickers in the right place. Before printing, pick the best printer for Cricut stickers. Most people use an inkjet printer for bright colors. For weatherproof matte sticker paper, use the photo or glossy paper setting. This makes colors look bright and clear.
To print the sticker sheet, do these steps:
Change printer settings to match sticker paper type and size. For inkjet printers, pick ‘photo paper’ or ‘glossy paper.’
Calibrate the printer for good color.
Print a test page on regular paper to check color and alignment.
Load the sticker paper the right way, following printer instructions.
Use high-quality or slow print settings to stop smudges or mistakes.
Let the sticker sheet dry before you touch it.
Tip: Always print the sticker sheet with registration marks showing. If marks are missing or cut off, Cricut print then cut problems can happen.
Prepare the Cutting Mat
A ready mat helps the print and cut stickers process work well. Use a Standard Grip or Light Grip mat to hold sticker paper tight. Put the sticker paper in the top left corner using the mat’s lines. Press the sticker paper down with a brayer or your fingers so it does not move while cutting.
Let the ink dry before putting the sticker sheet on the mat to stop smudges. Loading the mat the same way each time helps the Cricut machine cut right. Some people mark the mat with a rectangle that matches the sticker paper size for better placement.
Make sure the mat is sticky enough to hold the sticker paper.
Practice loading the mat in the same spot every time.
Put the mat all the way against the left bracket and up to the black roller.
Try a test cut on scrap paper to check alignment.
Note: If the mat is not sticky, clean it or use a new one for best results.
Select Cut Settings
Picking the right Cricut sticker paper settings is important for clean cuts. In Design Space, pick the material type that matches your sticker paper. For most print and cut stickers, “Sticker Paper, Removable” works well for kiss-cut. For die-cut, pick “Adhesive Sheet, Double-Sided” or “Paper, Adhesive-Backed.”
The table below shows good settings for different sticker paper types:
Sticker Paper Type | Kiss Cut Pressure | Kiss Cut Cricut Preset | Full Cut Pressure | Full Cut Cricut Preset |
|---|---|---|---|---|
Standard White Matte | 100 | Sticker Paper, Removable | 250 | Adhesive Sheet, Double-Sided |
Removable White Matte | 75 | Glitter Vinyl | 200 | Paper, Adhesive-Backed |
Aggressive White Matte | 100 | Sticker Paper, Removable | 200 | Paper, Adhesive-Backed |
100% Recycled White | 100 | Sticker Paper, Removable | 200 | Paper, Adhesive-Backed |
White Gloss Inkjet | 100 | Sticker Paper, Removable | 200 | Paper, Adhesive-Backed |
Weatherproof Gloss Inkjet | 150 | Light Patterned Paper | 220 | Printable Sticker Paper (White) |
Clear Matte Inkjet | 100 | Sticker Paper, Removable | 250 | Adhesive Sheet, Double-Sided |
Silver Foil Laser | 75 | Glitter Vinyl | 200 | Paper, Adhesive-Backed |
Pastel Blue | 100 | Sticker Paper, Removable | 250 | Adhesive Sheet, Double-Sided |
Chalkboard Labels | 200 | Paper, Adhesive-Backed | 350 | Birch, Permanent Adhesive |
You may need to change settings a little if the blade is old or the sticker paper is thick. You can change cut pressure in Design Space. If the cut does not go through the sticker layer, make the pressure higher. If the cut goes through the backing, make the pressure lower.
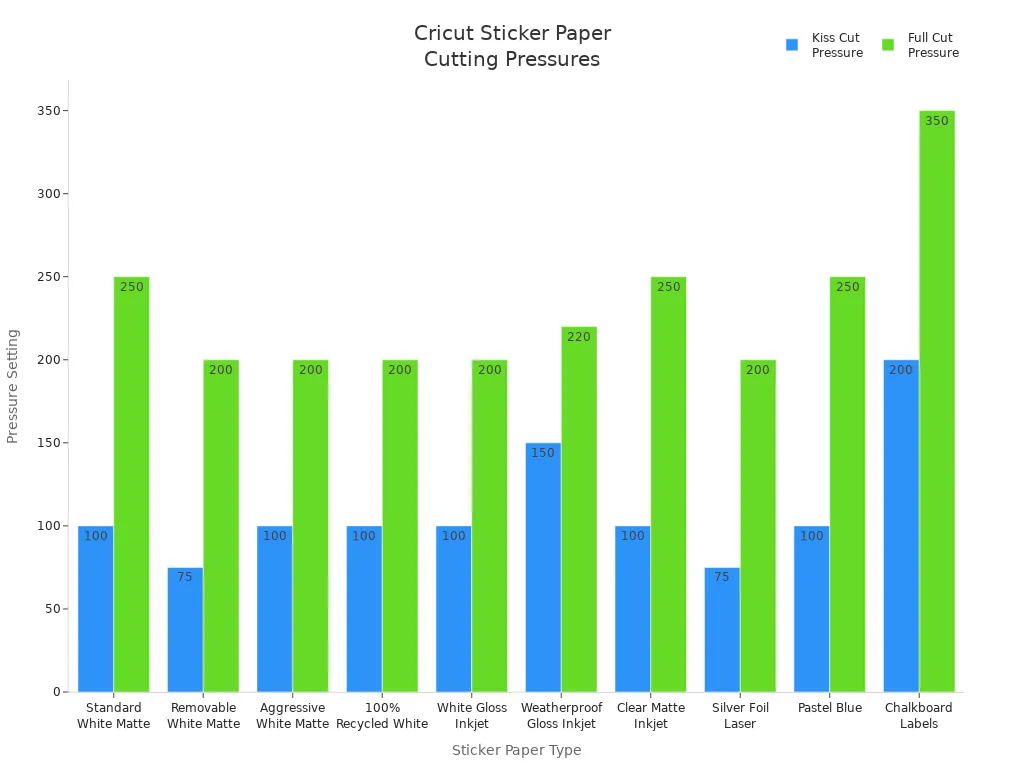
Callout: Changing cut pressure helps stop Cricut print then cut problems and gives professional results.
Cut Types: Kiss-Cut vs Die-Cut
The print and cut stickers process has two main ways to cut: kiss-cut and die-cut. Each way changes how the sticker sheet looks.
Kiss-cut stickers: The Cricut machine cuts only the sticker layer. The backing paper stays whole. This makes a sticker sheet with extra backing around each sticker. Kiss-cut stickers are easy to peel and good for lots of stickers or planner stickers. The extra backing keeps sticker edges safe and lets you add branding or extra design.
Die-cut stickers: The Cricut machine cuts both the sticker and the backing paper to match the sticker shape. Die-cut stickers look neat and professional with no extra border. These stickers are good for events, business, or when you want single stickers.
Kiss-Cut Stickers | Die-Cut Stickers | |
|---|---|---|
Cutting Process | Cut only through sticker layer; backing paper stays whole | Cut through both sticker and backing; backing cut to sticker shape |
Backing Appearance | Extra backing border around sticker | Backing cut to sticker shape, no extra border |
Peeling Experience | Easier to peel because of extra backing | Peeling is direct, no extra backing border |
Durability in Transport | More durable; extra backing keeps edges safe | Less edge protection during transport |
Production Efficiency | Can print many stickers on one sheet; saves money | Single stickers cut to shape; not as good for sheets |
Design Presentation | Backing border can show branding or extra design | Clean look shows detailed shapes |
Use with Cricut | Leaves backing for easy peeling and making sheets | Makes single stickers cut to shape |
When making stickers with Cricut, pick the cut type that fits your needs. Kiss-cut is best for sticker sheets and planners. Die-cut is good for homemade stickers vs professional sticker sales where looks matter.
Tip: For most print sticker sheets, kiss-cut is the easiest and fastest way.
Common Print Then Cut Issues
Many people have Cricut print then cut problems when making stickers. The table below lists common problems and ways to fix them:
Issue Description | Cause/Reason | Troubleshooting or Notes |
|---|---|---|
Registration marks not fully printed or cut off | Missing marks stop Cricut from finding cut lines | Make sure marks are printed; use black marker to fill missing marks; print on white or light matte paper; do not use glossy paper; change lighting; close machine lid; use clear matte tape over marks if using glossy paper |
Alignment and calibration problems (cuts not matching printed image) | Calibration is off or cuts drift after many cuts | Use Design Space calibration tool; recalibrate machine; drifting cuts may need Cricut support as there is no fix yet |
Print quality issues (colors printing wrong) | Software glitches or printer settings | Check print settings for high quality; some glitches only change preview but print is fine; contact Cricut support if colors print wrong |
Software glitches causing bad or missing preview images | New software updates or beta versions | Switch between beta and live Design Space; some glitches have no quick fix and are being worked on by Cricut |
Trouble seeing registration marks because of paper or lighting | Glossy paper or bad lighting | Use matte paper; change room lighting; use flashlight to help scanning; close machine lid to help sensor see marks |
Confusion about bleed setting making images print thicker | Bleed makes image edges bigger for cutting | Know what bleed does; turning bleed on makes edges thicker to stop white edges after cutting |
Known problems with no quick fix (like drifting cuts, preview glitches) | Software bugs or hardware limits | Contact Cricut support; some problems are known and being fixed; going back to older software may help |
By following these steps and tips, you can print and cut stickers with confidence. The print-then-cut tool helps anyone make stickers with Cricut for crafts, business, or gifts. With the right Cricut sticker paper settings and careful steps, you can stop most Cricut print then cut problems and make professional sticker sheets at home.
Troubleshooting and Tips
Common Mistakes to Avoid
A lot of beginners make mistakes when printing and cutting stickers. Using glossy sticker paper can cause problems. The Cricut sensor has trouble with shiny reflections. Putting sticker paper in the wrong spot on the mat can mess up cuts. If the mat is not held down well, stickers might tear or move. Sometimes people forget to change cut settings for old blades or thick paper. New mats can be too sticky and rip stickers when you pull them off. Always pull the sticker off the mat, not the mat off the sticker, to stop damage. Printing outside Design Space can miss registration marks. These marks help the machine cut stickers right. Printing with page scaling or thin marks can mess up alignment. Some beginners use the bleed feature wrong, making thick outlines. If you flatten designs the wrong way, the machine might cut every letter instead of the whole shape. Clean smudges near registration marks and close the lid to help the sensor work better.
Tip: Always print in Design Space and check sticker paper settings before you start. This helps you avoid common Cricut print then cut problems.
Tips for Clean Cuts
To get clean cuts, follow some easy steps. Change the lighting so no bright light hits the Cricut sensor. Put sticker paper in the top-left corner of the mat. Smooth it out so there are no wrinkles. Make sure the mat is flat and clean near the sensor marks. Use matte sticker paper or put matte tape over marks if you use glossy paper. Check that your image fits inside the printable area. Clean the Print Then Cut sensor with a dry paintbrush. Make sure the sensor turns on when scanning. Set your printer to portrait mode. Do not use low ink. Print at actual size with no scaling. If cuts are still off, recalibrate the machine and check for updates in Design Space. If you still have trouble, contact Cricut Member Care.
Note: Slowly change cut pressure in sticker paper settings for best results. The best printer for Cricut stickers should print clear marks and handle thick paper without jamming.
Storing and Using Stickers
Storing stickers the right way keeps them looking new. Keep sticker sheets flat in their original package so they do not curl or bend. Store them in a dry place between 68–75°F and 40–50% humidity. Keep sticker paper away from sunlight to stop yellowing and sticky problems. Use closed boxes or file cabinets to keep out dust and water. Do not put heavy things on sticker sheets or they will bend. Use old stickers first by rotating your stock. Handle sticker sheets with clean hands to keep them sticky. Even with good storage, stickers can get worse over time, especially with heat or wet air. Use stickers for crafts, planners, or gifts so you can enjoy them before they lose quality. People compare homemade stickers and professional ones, but with good care, homemade stickers can last and look nice.
Callout: Print and cut stickers can decorate notebooks, laptops, planners, and more. You can also make custom gifts or party labels with print and cut for special projects.
Anyone can make sticker sheets with Cricut by following easy steps. You learn to design, print, and cut stickers. Use the right Cricut sticker paper settings for best results. Beginners get better by practicing and testing different sticker papers. Try using laminates and blades to see what works. Cool design ideas like metallic polka dots and shiny finishes help you be creative. There are many guides, workshops, and online groups to help beginners. Cricut is great for small projects and crafts. Professional suppliers are better for big business orders. If you want custom labels or stickers, check the website for more choices.
Using new materials and designs helps you make print and cut stickers that last longer and look cooler.
Popular Cricut Sticker Sheet Trends in 2024 |
|---|
Metallic Polka Dots |
Vinyl Calligraphy and Watercolor |
Glitter Totes |
Holographic Totes |
Decals for Christmas |
FAQ
What is the best way to print sticker sheets with Cricut?
He should use Print Then Cut in Design Space. This tool lines up cuts with printed designs. Good sticker paper and a set-up printer help a lot. Calibrate the printer for the best stickers.
Why does my Cricut not cut stickers correctly?
This happens if calibration is off or settings are wrong. He should check if the blade is sharp and the mat is sticky. Make sure sticker paper matches the settings in Design Space.
Can I use any printer to print sticker sheets?
Most inkjet printers work for sticker sheets. He should pick a printer that prints bright colors. Some printers can handle thick sticker paper better than others.
How do I avoid Cricut print then cut problems?
He should always print with registration marks showing. Use matte sticker paper and keep the sensor area clean. Calibrate often and use good lighting so the machine reads marks right.
What is the difference between homemade stickers vs professional stickers?
Homemade stickers are fun and good for small projects. Professional stickers last longer and look the same every time. They are better for big orders. He should think about cost, quality, and how many stickers he needs.