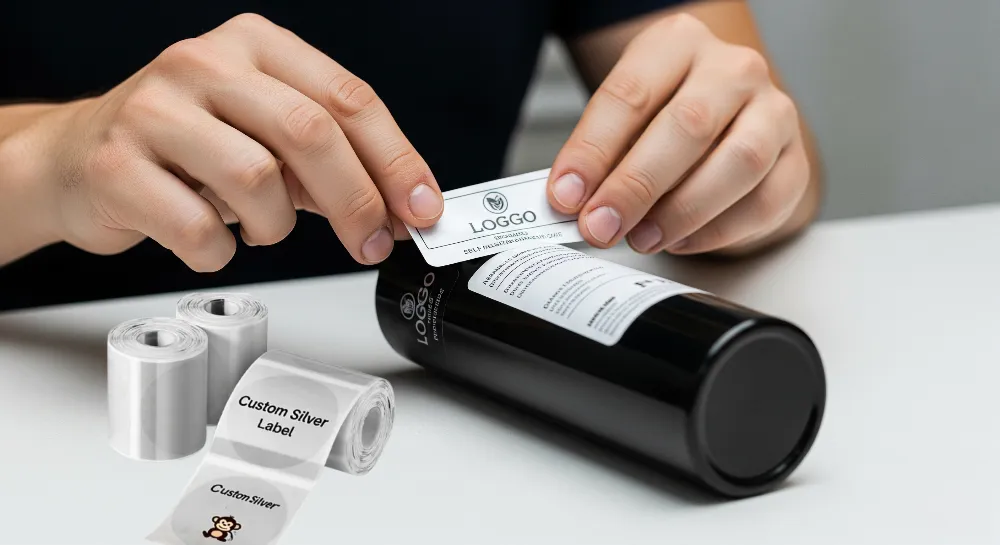
Have you tried to apply self-adhesive labels and ended up with bubbles or crooked edges? Maybe the corners started to peel off. You’re not alone. There are simple steps that make a big difference. First, ensure the surface is clean. Next, carefully apply self-adhesive labels in the right spot. Then, smooth them out to eliminate any wrinkles. By following the same steps professionals use, your custom labels and thermal labels will last longer and look neat.
Industry tests show that labels stick better when you properly apply self-adhesive labels. They can resist chemicals and remain easy to read even after heavy use.
Key Takeaways
Always clean and dry the surface first. This helps the label stick well and not peel off.
Keep labels and items at room temperature for a day. This helps the adhesive stick better and last longer.
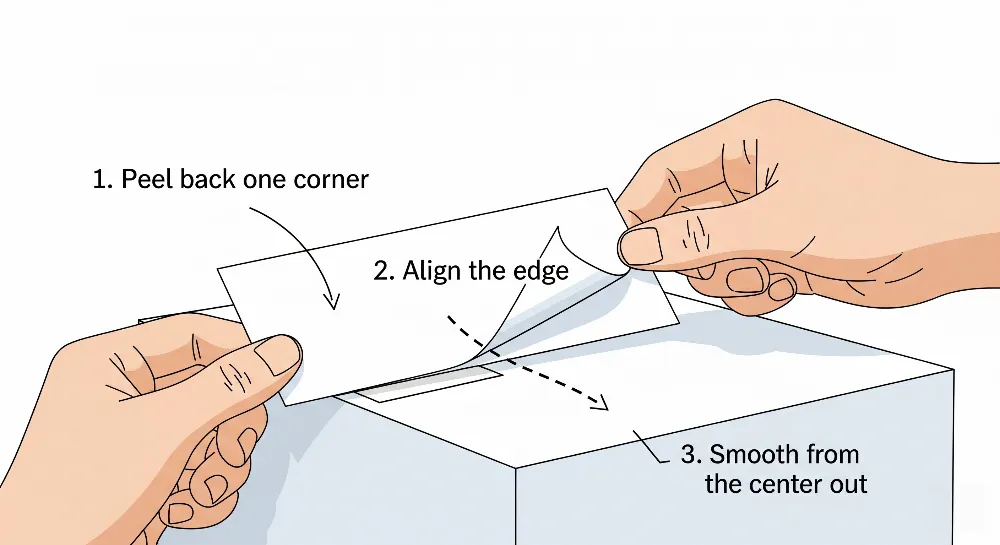
Peel the backing off carefully. Do not touch the sticky side. Place and line up the label slowly. Use guides like painter’s tape.
Press the label down from the center out. This removes bubbles and wrinkles. Use a plastic card or squeegee for a smooth look.
Let the label sit for one to three days. Do not move or wash it. This helps the adhesive bond and last longer.
Supplies and Preparation

Getting ready to use self-adhesive labels matters a lot. When you set up your area and gather your tools, your labels will stick better and last longer. Let’s look at the steps so you can get a neat result every time.
Workspace Setup
Choose a flat, clean spot with bright light. If there is dust or dirt, it can stick to the adhesive and make it weaker. Try to keep the humidity between 40% and 50%. Too much humidity can make labels peel or curl. If it is too dry, the pressure sensitive adhesive can dry out. Keep the temperature steady, between 68°F and 75°F, so your self-adhesive labels work well.
Tip: Keep your labels in sealed bags until you need them. This stops dust and moisture from getting in.
Tools
Here are some tools that help when using self-adhesive labels:
Labels (custom labels or thermal labels)
Plastic card or squeegee for smoothing
Painter’s tape for lining up
Microfiber or lint-free cloth
Gloves (optional, to keep off fingerprints)
Clean the Surface
Always clean the surface before you use self-adhesive labels. Oils, dust, and grease can stop the label from sticking. One logistics company had a 15% failure rate when they did not clean first. After using isopropyl alcohol, the failure rate dropped to less than 3%. Use a 50:50 mix of isopropyl alcohol and water, or mild soap and water, with a lint-free cloth. Make sure the surface is dry before you start.
Room Temperature Labels
Keep your self-adhesive labels at room temperature before using them. Store them in a dry, dark place at about 72°F and 50% humidity. Stay away from heat, sunlight, and moisture. If labels get too hot or cold, the adhesive may not work right. Let your labels and the item you are labeling sit at room temperature for at least 24 hours before you use them. This helps the adhesive stick well and last long.
Note: Try not to touch the sticky side of the label. Oils from your fingers can make it not stick as well.
Best Way to Apply Self-Adhesive Labels
Applying self-adhesive labels can feel tricky, but you can get a smooth, professional finish every time. Here’s the best way to apply labels, whether you’re working with jars, bottles, boxes, or other surfaces. Follow these steps for a flawless label application process.
Peel and Position
Peel backing paper carefully
Start by peeling the backing paper from one corner of your self-adhesive label. Try not to touch the sticky side. Hold the label by the edges to keep oils and dirt away from the adhesive.Pro Tip: If you have trouble peeling, use a craft knife or your fingernail to lift just the corner. This helps keep the label flat and clean.
Position the label
Hold the label above the surface before you stick it down. Take your time to line it up with any guides or marks you made earlier. For jars and bottles, center the label so it wraps evenly. For boxes, start at one edge.Pro Tip: Use painter’s tape to create a straight guide. Painter’s tape sticks well to most surfaces, peels off cleanly, and helps you align the label perfectly.
Align the Label
Align the label with care
Place the edge or center of the self-adhesive label onto the surface. For round items like bottles, start in the middle and smooth outward. For flat items like boxes, begin at one edge and roll the label on.Pro Tip: If you need to reposition, do it gently before pressing down fully. Some labels, like BOPP, allow a little adjustment right after you apply your label.
Check for straightness
Step back and look at the label from different angles. Make sure you align the label with any edges, seams, or design elements. Painter’s tape works great for this step, especially if you want sharp, clean lines.Pro Tip: For custom labels or thermal labels, use a ruler or template to keep everything even. This is how professionals get consistent results.
Apply Labels Smoothly
Apply labels by hand with even pressure
Once you’re happy with the placement, press firmly in the center of the label. Use your fingers, a plastic card, or a squeegee to smooth the label outward. This helps push out air bubbles and makes the adhesive stick well.Pro Tip: Always start from the center and move outward. This method works best to avoid bubbles and wrinkles, especially when you apply self-adhesive labels to curved surfaces.
Press firmly and finish the edges
Go over the entire label, especially the edges and corners. Press firmly to make sure every part sticks. For thicker labels, you might need a bit more pressure. Thin vinyl labels are easier to smooth and less likely to wrinkle.Pro Tip: If you spot a small bubble, use a pin to pop it and press the air out. For larger bubbles, a little heat from a hairdryer can help soften the adhesive so you can smooth it out.
Let the label set for best adhesion
After you apply your label, avoid touching or moving the item for at least 24 hours. This curing time lets the adhesive bond fully. For the strongest hold, let self-adhesive labels set for up to 72 hours, especially if you plan to wash or handle the item often.Pro Tip: Store labeled items at room temperature during this period. Avoid moisture, heat, or direct sunlight to help the adhesive cure.
Quick Reference Table: Common Mistakes and Fixes
Mistake | Cause | How to Fix |
|---|---|---|
Air bubbles | Uneven pressure, dirty surface | Smooth from center out, clean first |
Wrinkles | Rushing, thick label stock | Apply slowly, use thin labels |
Peeling corners | Not pressing edges, cold temp | Press edges, warm up surface |
Crooked placement | No guide, rushing | Use painter’s tape, go slow |
Remember: The best way to apply self-adhesive labels is to work slowly, use the right tools, and let the adhesive cure. This is how you get a professional application every time, whether you apply labels by hand or use a label applicator.
Troubleshooting and Tips
Avoid Bubbles and Wrinkles
Bubbles and wrinkles can make your custom labels look messy. You want a smooth finish every time. Here are some tips to avoid wrinkles and remove bubbles:
Always clean and dry the surface before you start. Dirt or moisture can trap air under the label.
Apply the label at room temperature. Cold or hot surfaces can cause the adhesive to fail.
Use the hinge method: Place a strip of painter’s tape along one edge of the label to hold it in place. Peel back the backing, then press the label down from the taped edge, smoothing as you go.
For flat surfaces, start at one edge and smooth out wrinkles by pressing from the center outward. For curved surfaces, begin in the middle and work toward the edges.
Use a plastic card or squeegee to press out air pockets. If you spot a bubble, gently lift the label and press it down again, or use a pin to pop and flatten it.
If you use thermal labels or custom labels, always check the label material. Flexible vinyl or PE labels work better on tricky surfaces and help you get a professional application.
Curved and Flat Surfaces
Curved and flat surfaces need different approaches. On flat surfaces like boxes, you can apply labels in one smooth motion. Start at one edge and use even pressure to avoid bubbles. On curved surfaces, like bottles or tubes, choose labels made for flexibility. Vinyl and PE labels bend easily and stick better.
For curved items, use wrap-around labels for extra hold.
Press from the center and work outward to keep the label flat.
If the label starts to lift, press it back down while the surface is still cool.
Glass and plastic surfaces each have their own challenges. Glass is smooth but non-porous, so you need a strong adhesive. Plastic can be tricky—some types need special adhesives or surface treatments. Always match your label type to the surface for the best results.
Long-Lasting Adhesion
You want your labels to last. The right storage and application make a big difference. Store unused labels in a cool, dry place away from sunlight and moisture. High humidity and heat can cause labels to curl, fade, or lose their stickiness. Keep labels in their original packaging and use them within a year for best results.
Let your labels and items sit at room temperature before applying.
Use moisture- and temperature-resistant materials for items exposed to harsh conditions.
Give the adhesive time to cure—24 to 72 hours—before handling or washing.
Pro tip: Regularly check your labeled items. If you see peeling or fading, replace the label to keep your information clear and professional.
You can get a professional application every time if you follow these steps:
Clean and dry the surface to remove dirt, oils, or moisture.
Make sure your custom labels and items are at room temperature.
Peel the backing without touching the sticky side.
Press the label on with firm, even pressure, smoothing out bubbles or wrinkles.
If you’re new to label application, try practicing on a test surface first. When you use these tips, your thermal labels and custom labels will look sharp and last longer. Ready to give your business a boost? Trust our labels for a flawless finish every time!
FAQ
How do I keep my labels from peeling off?
Make sure you clean the surface before you stick on your label. Press down the edges well. Let the label set for at least 24 hours. Store your items at room temperature for the best hold.
Can I use self-adhesive labels on plastic and glass?
Yes, you can use self-adhesive labels on both plastic and glass. Clean the surface first. Choose labels made for your surface. Some plastics need special adhesives for a strong, professional application.
What should I do if I get bubbles under my label?
Use a plastic card to smooth out the bubbles from the center to the edge. If a bubble stays, pop it with a pin and press it flat. Work slowly for the best results.
Are thermal labels different from custom labels?
Thermal labels work with heat-based printers. Custom labels can be any shape, size, or design you want. Both types use self-adhesive backing, but you pick the one that fits your needs.
How long should I wait before washing a labeled item?
Wait at least 24 to 72 hours before washing. This gives the adhesive time to cure. Your label will stick better and last longer.