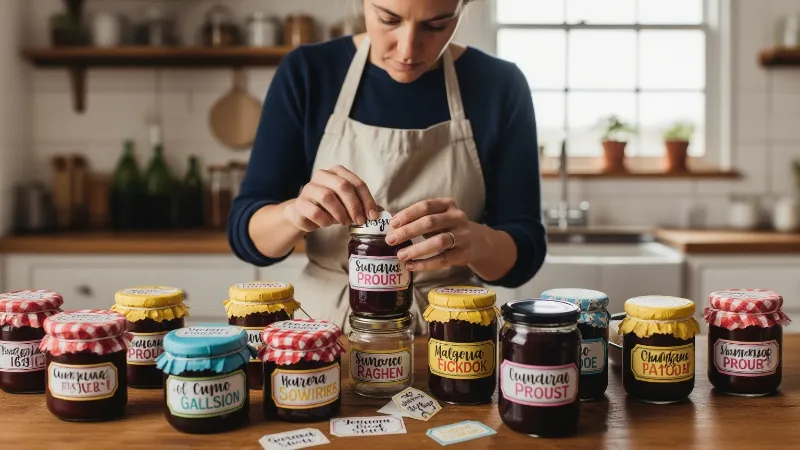
Anyone can start making custom product labels by following easy steps. First, they choose the best label type for their product. Then comes the fun part—making custom labels with online tools or templates. People can print labels at home or use a professional service. This gives them lots of choices. The last step is putting the custom labels on the products. DIY fans and business owners both see that custom product labels make products stand out.
Key Takeaways
Pick the best label type, size, and shape for your product. This helps your product look special. Use simple online tools like Canva or Avery to make labels that match your brand’s style. Print labels at home if you only need a few. Use a professional service for big orders to save money and get good quality. Clean and dry your product before putting on labels. This stops bubbles and peeling. Put labels on slowly with the right glue. Smooth out air bubbles so the label looks nice and stays on.
How to Make Labels
Label Types
Picking the right label type is the first thing to do. There are many choices for custom labels. Some popular types are:
Metallic labels
Removable labels
Waterproof labels
Cosmetic labels
Craft beer labels
Household product labels
Cannabis product labels
Specialty labels for medical, veterinary, or retail use
Each label type has its own job. Food labels tell what is in the food and show nutrition facts. Cosmetic labels are made to look nice and show the brand. Waterproof and removable labels are good for wet places or if you want to take them off easily. People should think about what their product needs before picking a label. Custom labels help products get noticed and follow rules for different businesses.
Size and Shape
Size and shape are very important for custom labels. The right size and shape make products look better and easier to find. Circular labels look fun and playful. Square or rectangular labels feel strong and steady. Shrink sleeve labels wrap all around and show designs on every side.
When making labels for bottles, jars, or boxes, people should:
Measure the part of the container where the label will go.
Choose a label shape that fits the container, like rectangles for boxes or circles for jars.
Make sure the label is not too small or too big. Small labels are hard to read. Big labels might not fit.
Think about how much information needs to be on the label. Sometimes, using more than one label is best.
Pick materials and adhesives that stick well, even on curved or bumpy containers.
Custom labels can be almost any size or shape. People can try different looks to see what works for their brand. The right size and shape help labels stand out and give customers the details they need.
Custom Product Labels Design

Online Tools and Templates
Making custom labels is easier than ever. Now, anyone can use online tools to make cool designs. You do not need to be a graphic designer. Avery Design & Print is a favorite for many people. It has free templates and lets you change designs easily. You can even make barcodes and QR codes. Users can save their work online and print from any device. The site is simple to use. Beginners and experts can both use it right away.
Canva is also a great choice. It has thousands of free templates and a drag-and-drop editor. People like the brand kit feature. It helps keep all custom labels looking the same. Canva lets teams work together on designs. If you want more features, try Adobe Express or Maestro Label Designer. These tools have advanced options and flexible templates. They help you make professional custom product labels for any product.
Tip: Pick a template that matches your product’s shape and size. This saves time and helps you avoid mistakes.
Personalization
Personalized labels help products get noticed and connect with buyers. Businesses start by picking fonts that fit their brand style. They add icons or images to make the label special. Color choices are important, too. Bright colors or trendy looks like metallic or neon help custom labels stand out.
Most people pick from ready-made templates, blank pages, or custom sizes for their packaging. Design tools like Canva, Adobe Express, and Avery let you upload logos, add images, and change colors or fonts. These steps help anyone make unique product labels that show off their brand.
Personalized labels do more than look nice. They help people remember the brand and want to buy again. When customers see the same colors, logos, and fonts, they remember the brand. Using the same custom labels builds trust and makes people want to come back. Some brands use QR codes or peel-back labels to share more or make things fun.
Note: Personalization is not just about looks. It is about telling a story and making customers feel special.
Design Tips
Great custom labels do more than decorate products. They give important information and show the brand’s style. Here are some tips for making good custom product labels:
Use clear, legible typography. Make sure people can read the label from far away.
Balance simplicity with uniqueness. Simple designs are easy to see, but a special touch makes the label stand out.
Keep branding consistent. Use the same colors, fonts, and logo spot on all custom labels.
Create a visual hierarchy. Make the most important info, like the product name, easy to find.
Show off sustainability. Eco-friendly materials and symbols attract shoppers who care about the planet.
Match the design to your audience. Think about what your customers like and care about.
Design Element | Why It Matters | Example |
|---|---|---|
Typography | Makes the label easy to read | Large, bold product name |
Color Scheme | Builds brand identity | Using the same brand colors |
Logo Placement | Helps people recognize the brand | Logo at the top or center |
Visual Hierarchy | Shows the most important info first | Bigger font for benefits |
Material/Finish | Adds quality and makes it look nice | Matte or gloss finish |
Designers should follow good printing rules. Use vector graphics in programs like Adobe Illustrator. Design in CMYK color mode for better printing. Add a bleed area so there are no white edges after cutting. Upload high-quality logos and keep the layout simple. Too much text or too many pictures can make the label messy. Change text to outlines before printing to stop font problems.
Rules are important, too. Labels must have the right product info, batch numbers, expiration dates, and maker details. Some products need special symbols or warnings. Labels should stay easy to read in different places, so use strong materials and glue.
Trends for 2024: Simple designs, big letters, and eco-friendly materials are popular. Brands tell stories on labels to connect with people. Fun features like QR codes and AR make labels more interesting. Personalization and caring for the planet are still very important.
Custom product labels help brands share their story, show product benefits, and build trust. With the right design, any product can stand out and get loyal customers.
Print Custom Labels
Home Printing
Lots of people print custom labels at home. This is good for small amounts or trying new ideas. Home printing saves money for small jobs. It also gives fast results. People use inkjet or laser printers with special label sheets. Inkjet printers are best for bright or photo labels. Laser printers are faster and good for big jobs. DYMO and Zebra printers can also print custom labels.
To get the best results, users should:
Use inkjet labels with inkjet printers and laser labels with laser printers.
Make sure the printer fits the label sheet size.
Pick the right template and set paper scale to 100%.
Print a test page first.
Set the printer to “labels” or “heavyweight” mode.
Cutting machines like Cricut make cool shapes. Home printing is cheap for small jobs. But it costs more for big orders.
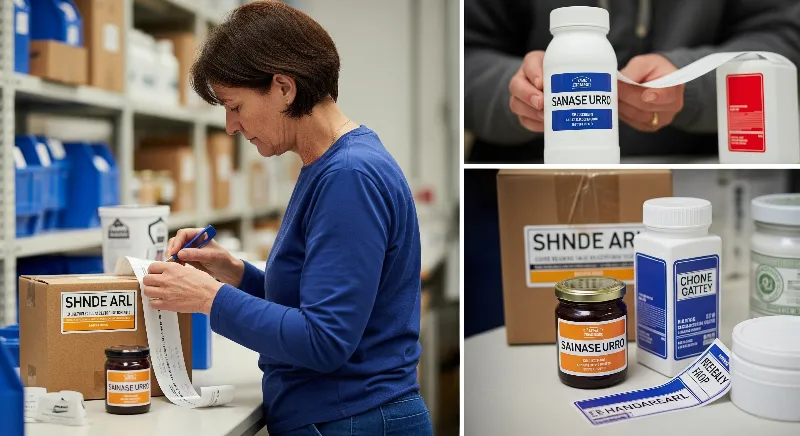
Professional Printing
Professional printing services make high-quality custom labels for big orders. These services use special printers and materials. They offer expert help, lamination, die-cutting, and many finishes. The price for each label goes down when you order more. For example:
Order Quantity (labels) | Approximate Price per Label (USD) |
|---|---|
100 | $0.71 |
1,000 | $0.12 |
10,000 | $0.05 |
50,000 | $0.02 |
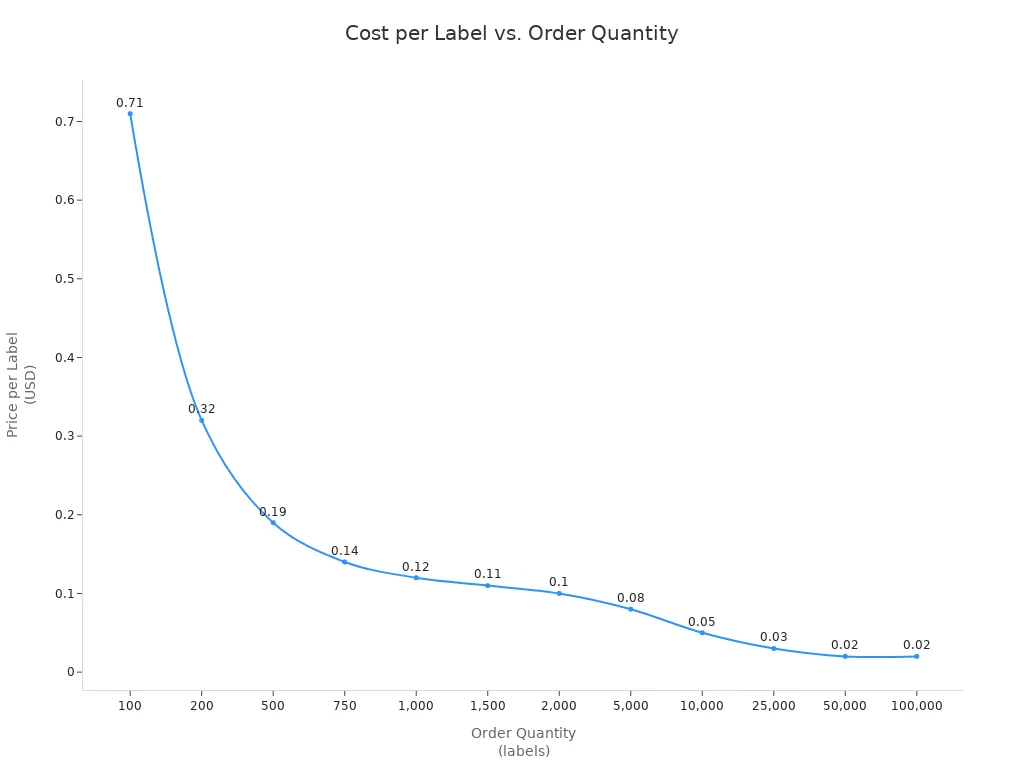
Professional printing is great for big projects. You can use fancy materials. But it can take longer because of shipping and order limits.
Materials and Finishes
Good materials and finishes help custom labels last and look nice. Waterproof and scratch-proof labels use strong plastics like vinyl or polypropylene. Finishes like UV coating, lamination, and embossing protect from water, oil, and fading. Here are some common choices:
Material Type | Properties | Common Uses |
|---|---|---|
Waterproof, strong | Food, drinks, lotions | |
Metallic Plastic | Waterproof, oil-proof | Strong, waterproof labels |
Clear Plastic | Waterproof, see-through | Clear, waterproof labels |
White Vinyl | Bendable, waterproof | Cosmetics, oils, bendy labels |
colors bright. Matte finishes look fancy. Eco-friendly choices like recycled paper or bioplastics help the earth and bring in buyers. Many shoppers like products with green custom labels.
Apply Labels
Surface Prep
Getting ready for custom labels starts with cleaning. Wash your hands first so you do not get oil on the container. Use rubbing alcohol, mild soap, or a cleaner to wipe off dust and dirt. A lint-free cloth is best for wiping away fingerprints. Make sure the surface is dry before you start. If the container is smooth or hard to stick to, sand it lightly with fine sandpaper. Both the product and custom labels should be at room temperature for a day. This helps stop bubbles and wrinkles. Check if the adhesive works with the container and where it will be used. A steady container makes it easier to put on the label right.
Steps for surface prep:
Clean the container with alcohol or soap and water.
Dry the surface all the way.
Wipe off fingerprints with a lint-free cloth.
Sand smooth spots if you need to.
Hold the container still when you put on the label.
Tip: Glass and metal hold custom labels better than some plastics.
Application Tips
Putting on custom labels needs a steady hand and patience. Line up the label with the container before you peel off the backing. Start at one edge and press down slowly. Smooth out air bubbles as you go. Flexible label stocks work well on curved bottles or jars. Use adhesives that match the container and where it will be used. Permanent adhesives stick well to glass and plastic. Removable or repositionable adhesives are good for labels you might move.
Adhesive Type | Best For | Notes |
|---|---|---|
Permanent | Long-term use, smooth surfaces | Hard to take off, very strong |
Removable | Temporary labels, easy removal | No sticky mess, not as strong |
Repositionable | Adjustable placement | Can turn permanent after a while |
Try not to touch the sticky side of custom labels. Press from the center out to the edges. Leave a small space around the label edge to stop peeling. For hard shapes, use a squeegee or roller. Good label skills help stop wrinkles, bubbles, and crooked labels.
Troubleshooting
Sometimes, custom labels do not stick or look right. Problems can be bubbles, wrinkles, peeling, or crooked labels. If this happens, check if the surface is clean and dry. Try a stronger adhesive or a more flexible label stock for curved containers. Put on labels at room temperature for the best results. If static electricity is a problem, make the air wetter or use anti-static tools. Always test custom labels on one container before doing many.
Problem | Cause | Solution |
|---|---|---|
Bubbles/Wrinkles | Dirty or wet surface, fast work | Clean and dry, go slow |
Peeling | Wrong adhesive, rough surface | Use stronger glue, sand the spot |
Crooked Labels | Rushed placement | Line up first, use guides or templates |
Static Issues | Dry air, static charge | Add humidity, use anti-static tools |
Note: Working with good label suppliers can help fix hard problems and keep custom labels looking great.
Making custom product labels is easy for everyone. Small business owners like making labels for any shipping job. Beginners use digital printing and laser cutting to save money. These tools also help them avoid mistakes. People can try different materials, like vinyl or polyester. This helps them pick the best label for each product. Anyone can get great results by testing new ways to make labels. Choosing blank labels or digital printers saves money too.
Tip: Try different label sizes, materials, and printing ways. This helps each brand find what works best for them.
FAQ
How can someone make labels waterproof?
You can use waterproof materials like vinyl or polypropylene. Laminating labels or spraying a clear coat helps too. These steps keep labels safe from water and oil. They also stop smudges from ruining the label.
What printer works best for home label printing?
Laser printers are good for printing lots of labels. Inkjet printers make bright colors and nice photos. Always use the right label sheets for your printer. This gives you the best results every time.
Can custom labels go on curved bottles or jars?
Yes, you can use flexible label materials like vinyl. These stick well to curved bottles or jars. Clean the container before putting on the label. Press from the center out to stop bubbles.
Do you need special software to design labels?
No, you do not need special software to design labels. Free online tools like Canva or Avery work well. These sites have templates and are easy to use. Paid programs give you more features if you want them.
What should a product label always include?
A good label shows the product name and brand. It also gives important information about the product. Food or cosmetics labels need ingredients, weight, and safety warnings. Clear labels help customers trust what they buy.